










5 Steps to Use the Same Electric Bike for School, Work, and Leisure Trips
Introduction
Lost a morning because your ebike setup did not match the day? You leave for class with a backpack, then realize your lights are dead for the evening shift, and the seat height still feels wrong from the last rider. That constant switching costs time, drains your Lithium-ion Battery faster, and turns a simple ride into a stressful scramble.
This how-to shows you how to run one electric bike for three routines: school, commuting, and weekend leisure. You will set a baseline fit, lock in legal ride settings, build a simple 3-route power plan, standardize carry and visibility, then protect the battery and the bike with repeatable habits. Along the way, you will see how the iScooter lineup (including electric scooters like the iScooter i9) fits into a broader, practical Zero Emissions workflow.
Step-by-Step ebike Setup for 3 Routines
Step 1: Build one baseline fit
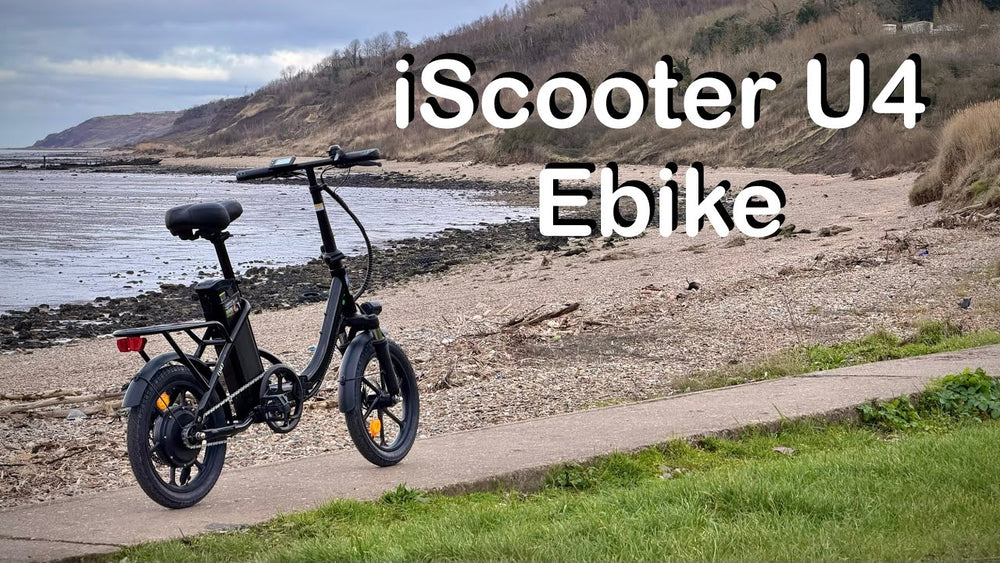
Lock your fit first so every ride starts the same, even when your schedule changes. Set saddle height so your knee stays slightly bent at the bottom of the pedal stroke. Next, level the saddle, then set handlebar height so your back stays relaxed and you can still look ahead without craning your neck. Finally, check brake lever reach so you can stop with two fingers without stretching.
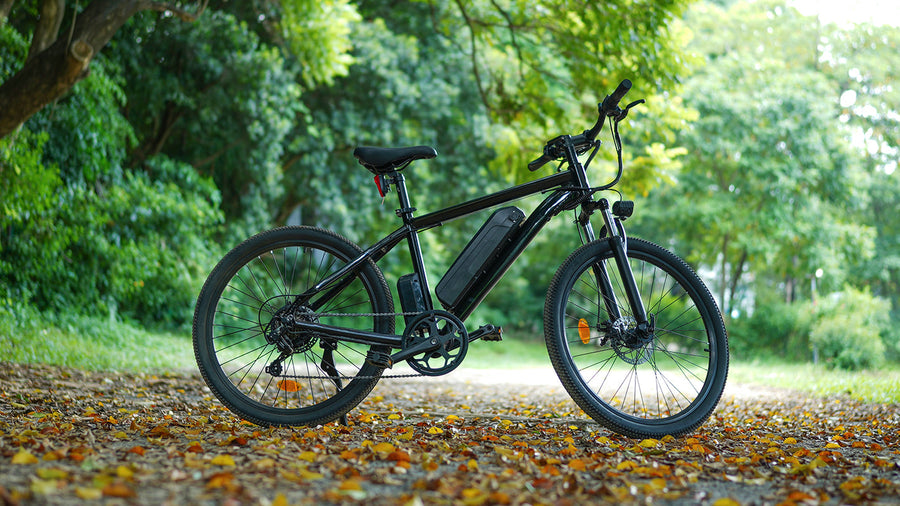
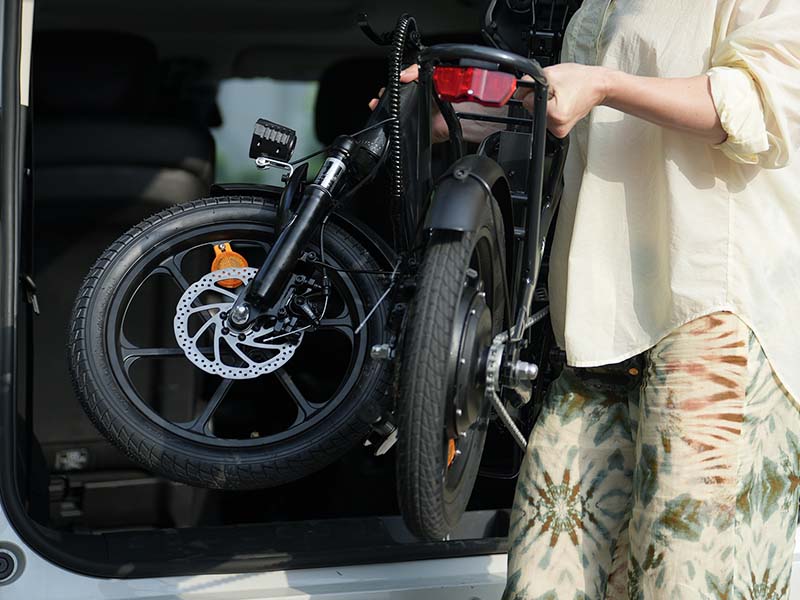
On a folding electric bike like the iScooter U4, a consistent baseline matters because a small change in reach or seat height can make the bike feel twitchy when you are carrying a bag. The U4 lists an adjustable seat post and a rider height range of 150 to 192 cm (4'11" to 6'4"), so you can mark your preferred seatpost height with tape for fast resets. Also note the bike weight (58.42 lb / 26.5 kg) when you plan stairs or indoor storage.
Shop: iScooter U3 E-Bike
Step 2: Lock legal ride settings
Your fastest way to ruin a good week is to change speed settings casually and then get surprised by what the bike does in traffic. Instead, set one legal default mode that matches your local rules, then only change assist levels within that limit. Start by confirming your display units (km vs miles) so your speed expectations match the screen. Next, verify that your pedal assist and throttle behavior match how you actually ride in stop-and-go conditions.
For the iScooter U4-style control layout shown on the iScooter page, the on/off behavior is simple: press and hold the "M" button for about 3 seconds to power the bike on or off. The page also describes entering settings by pressing "+" and "-" together, then navigating parameters like P01 (units) and P05 (speed limit behavior). Use that approach to lock your baseline and keep it consistent for school and work commutes, where predictable acceleration is safer than chasing top speed.
Shop: iScooter U3 E-Bike
Step 3: Create a 3-route power plan
Do this once, then stop thinking about battery math every morning. Build three presets you can apply in under 10 seconds: School, Work, and Leisure. Your goal is simple: keep cadence steady, keep the motor cool, and avoid arriving with a nearly empty pack. The iScooter U4 page lists a range of 35 to 55 miles (55 to 90 km) plus a 36V 10.4Ah battery, so your plan should treat that range as variable, not guaranteed.
Use this simple power plan:
- School (short, stop-and-go): lowest assist that keeps you rolling smoothly
- Work (time-critical): moderate assist, save the highest setting for hills
- Leisure (exploring): mix low assist and short boosts for headwinds
If you also use electric scooters for true Last-mile Delivery or tight city hops, keep the same planning mindset: pick a default mode and only boost when the route demands it. That discipline is what makes one battery-powered routine feel reliable day after day.
Shop: iScooter U3 E-Bike
Step 4: Standardize carry and visibility

Stop improvising how you carry gear. A stable carry setup prevents steering wobble and keeps you from overloading your shoulders on back-to-back rides. Pick one primary storage location (handlebar bag or rack bag) and use it every time, even on short trips. Then add a simple visibility routine: lights on before you roll, and a quick brake check before you merge into traffic.
The iScooter Handlebar Bag is designed to attach with dual buckles directly onto a handlebar and it lists TPU material with dimensions of L280 mm by H150 mm. That size works well for keys, mini tools, and a light jacket, which keeps your pockets clear and reduces distractions. If you ride in wet weeks, pair your carry routine with full fenders (the iScooter U4 page calls out full fenders and a rear rack with brake light), because staying cleaner also keeps your drivetrain and braking surfaces in better condition.
Shop: iScooter Handlebar Bag
Step 5: Protect battery and bike
If you protect the Lithium-ion Battery, you protect your whole schedule. Store your battery and bike where temperatures stay stable and dry, then charge with clear space around the charger and pack. A recent ITU white paper lists an optimal storage temperature range of 15 C to 25 C for lithium-ion battery applications, which is a useful, simple target for home storage. (itu.int)
Next, reduce theft risk with habits that you actually follow when you are tired: lock the frame and both wheels to a secure stand, remove easy-grab accessories, and avoid leaving the bike in the same predictable spot every day. Police.uk emphasizes locking the frame and both wheels to a secure cycle stand and also notes component security options like locking skewers or nuts. (police.uk) If you want extra weather protection in a shared storage area, a dedicated cover helps keep grit and moisture off contact points.
Shop: iScooter Cover for U1/U3 E-Bike
E-bike Setup in Different Scenarios
Multi-stop days (classes, errands, gym)
- Pack the same pouch every time: keys, charger, mini tool
- Keep assist one step lower than normal
- Add a 10-minute buffer for locking
Rain weeks (wet roads and dirty spray)
- Brake check before every descent
- Wipe rims and rotors after the ride
- Keep lights on even in daylight
Late rides (dark commute home)
- Turn lights on before you start
- Use a steady, predictable line
- Avoid sprinting past parked cars
Last-mile delivery (repeat stops)
- Reset the same parking routine every stop
- Keep load centered, not swinging
- Save high assist for hills only
Before You Start
Required Tools and Materials
- Helmet that fits snugly
- Gloves for wet grips and falls
- Weatherproof jacket for cold wind
- Pump and tire pressure gauge
- Tire levers and patch kit
- Spare tube matched to your tire size
- Charger stored in a dry bag
- U-lock plus a secondary cable lock
Safety Considerations
- Do a 20-second brake squeeze test
- Avoid charging near combustibles
- Stop use if battery swells
- Keep cables clear of moving parts
- Ride slower on wet painted lines
Troubleshooting Guide
| Problem | Cause | Solution |
|---|---|---|
| Range drops fast | High assist, soft tires | Lower assist, inflate tires |
| Wobble under load | Bag weight off-center | Repack, center the load |
| Brake rub | Caliper misalignment | Re-center caliper bolts |
| Charger gets hot | Poor airflow | Clear space, unplug after |
| Headlight not on | Wrong button press | Long-press M button |
Use this quick order when something feels off:
- First: check tire pressure and brake feel
- Next: confirm assist mode and display units
- Then: inspect bag mounts and rack bolts
Conclusion
One electric bike can cover school, work, and weekend rides if you stop changing everything each time you ride. Set one baseline fit, keep legal settings consistent, and run a simple 3-route power plan so you do not burn battery chasing convenience. Then standardize carry and visibility so your routine stays calm even on wet or late days. Over time, those small habits support Zero Emissions travel and a more predictable, lower-stress commute.
Frequently Asked Questions
Can I use the same electric bike for school, work, and leisure trips?
Yes, you can use the same electric bike for all three if you standardize fit, carry, and assist settings. Start by locking in a single saddle height and handlebar position so your body position stays consistent. Then create one simple routine per route type (school, work, leisure) so you always know which assist level and gear load you will use. Finally, keep battery charging and locking habits the same so you are not solving new problems every morning.
How do I choose power levels for long commutes without killing range?
Choose the lowest assist level that keeps your cadence steady, then save higher assist for hills and headwinds. Most range loss comes from running high assist during repeated accelerations, so ease into starts and keep your speed smooth. If your commute is 30 to 60 minutes, plan to arrive with a buffer rather than finishing near empty. Also check tire pressure weekly because soft tires can waste energy and make the motor work harder.
What should I do if my ebike range suddenly drops?
Start by checking tire pressure and braking drag because those two issues can cut range quickly without obvious warning. Next, review your route conditions: strong headwinds, colder weather, and heavier loads can reduce range even if you do everything right. Then lower assist by one level and aim for a steady cadence instead of frequent bursts. If the battery still drains unusually fast, stop using it until you can inspect connectors and look for damage.
How can I carry books, a laptop, and gear without making the bike feel unstable?
Keep weight low and centered, and avoid hanging heavy loads from one side of the handlebar. Use one main bag location every day so you learn how the bike handles with that load. If the front end feels light or the steering wobbles, move heavier items closer to the frame and tighten bag straps. As a final check, do a short test ride in a safe area before you merge into traffic.
When should I replace or stop using a Lithium-ion Battery for safety?
Stop using the battery immediately if you see swelling, leaking, or a burning smell. You should also pause use if the battery gets unusually hot during normal charging or if the charger behaves inconsistently, because heat is a common warning sign. If you notice sudden capacity loss combined with physical damage, treat it as a safety issue, not just a performance issue. Store the battery in a cool, dry place away from flammable items until you can get it inspected or serviced.
Table of Contents
- Introduction
- Step-by-Step ebike Setup for 3 Routines
- E-bike Setup in Different Scenarios
- Before You Start
- Troubleshooting Guide
- Conclusion
-
Frequently Asked Questions
- Can I use the same electric bike for school, work, and leisure trips?
- How do I choose power levels for long commutes without killing range?
- What should I do if my ebike range suddenly drops?
- How can I carry books, a laptop, and gear without making the bike feel unstable?
- When should I replace or stop using a Lithium-ion Battery for safety?
iScooter E Scooter Collections:
Electric Scooter | Kids Electric Scooter | Electric Scooter for Adults | Electric Scooter with Seat | Off-Road Electric Scooter | Foldable Electric Scooter | Girls Electric Scooter | 1000W Electric Scooter | 2000W Electric Scooter | Boys Electric Scooter | Dual Motor Electric Scooter | Big Electric Scooter | Electric Scooter with Suspension | Lightweight Electric Scooter | Commuter E-Scooters | 3 Wheel Electric Scooter
Show more ▼iScooter E Bike Collections:
Foldable Electric Bike | Affordable Cheap Electric Bike | Electric Bike for Adults | Electric Motor Bikes | Trek Electric Bike | Fastest Electric Bike | Electric Road Bike | Full Suspension Electric Mountain Bike | Giant Electric Bike | Womens Ladies Electric Bike | Mens Electric Bike | Electric Bike with Throttle | Electric Gravel Bike | Electric Mountain Bike UK | Fat Tyre Electric Bike | Electric Hybrid Bike | Electric Motorised Bike | Electric Push Bike | 1000W Electric Bike | Cool Electric Bikes | Electric Off Road Bike | Pedal Assist Electric Bike | Good Electric Bikes | Small Electric Bike | Trek Electric Mountain Bike | 2000W Electric Bike | Full Suspension Electric Bike | Mini Electric Bike | Road Legal Electric Bike | Step Through Electric Bike
Show more ▼👍 Buying Guide | 🚴♂️ Riding Guide
📋 Feature Guide | ❓ Common problem

Product category
Electric Scooter
Cheap Electric Scooters for Adults | Fastest Electric Scooter | Kids Electric Scooter | Mini Electric Scooter
Electric Bike
U4 Foldable E-bike | EB3S E-MTB
Hoverboards
Electric Scooter for Kids | iK3Pro E-Scooter for Kids | iK7 Height Adjustable Kids E-Scooter






Article tags :
Leave us a message